Eye Tracking: Difference between revisions
Jump to navigation
Jump to search
| Line 21: | Line 21: | ||
==In Control Room== | ==In Control Room== | ||
*At the Eyelink station on the right side of the room, there is a cable with a yellow tag on it and connected to a battery box labelled EYELINK (pictured below). This is the transducer cable--plug it into the rightmost port (labelled with "12V") on the box on top of the tower unit. | *At the Eyelink station on the right side of the room, there is a cable with a yellow tag on it and connected to a battery box labelled EYELINK (pictured below). This is the transducer cable--plug it into the rightmost port (labelled with "12V") on the box on top of the tower unit. | ||
[[File: | [[File:EYELINK_transducer.jpg]] | ||
*Once the cables are connected to the eyetracker in the bore, turn on the tower unit. You will likely get errors if you try to power on before those cables are connected. | *Once the cables are connected to the eyetracker in the bore, turn on the tower unit. You will likely get errors if you try to power on before those cables are connected. | ||
Revision as of 17:22, 29 July 2022
EyeLink
MR Compatible EyeLink 1000
- CCN is equipped with an in-bore EyeLink 1000
Specifications
Setup
In Scanner
- The eyetracker is installed in the back of the bore. It should stay behind the blue tape marking the best position on the rail.
- There are three cables that need to be attached when you begin an eyetracking session:
- Two thick, black cables: Power cables. Plug them into the two round ports on the back of the eyetracker (doesn't matter which one goes on which side).
- One skinny, orange cable connected to a blue cable: Fiber optic cable. Plug it into its port on the back of the eyetracker.
- Remove the lens cap. Place it somewhere nearby so you can find and replace it again easily when your scan is complete.
- At this point, the Eyelink desktop computer in the control room can be turned on. The camera now needs to be aligned so that it points at the participant's eye (usually right) reflected in the mirror.
- Adjust the alignment as necessary. You may need to play around with both wheels until a stable image is achieved:
- Wheel close to lens: Focus wheel.
- Wheel close to base: Aperture wheel.
- Large knob near the base: Adjust eyetracker positioning in all directions.
In Control Room
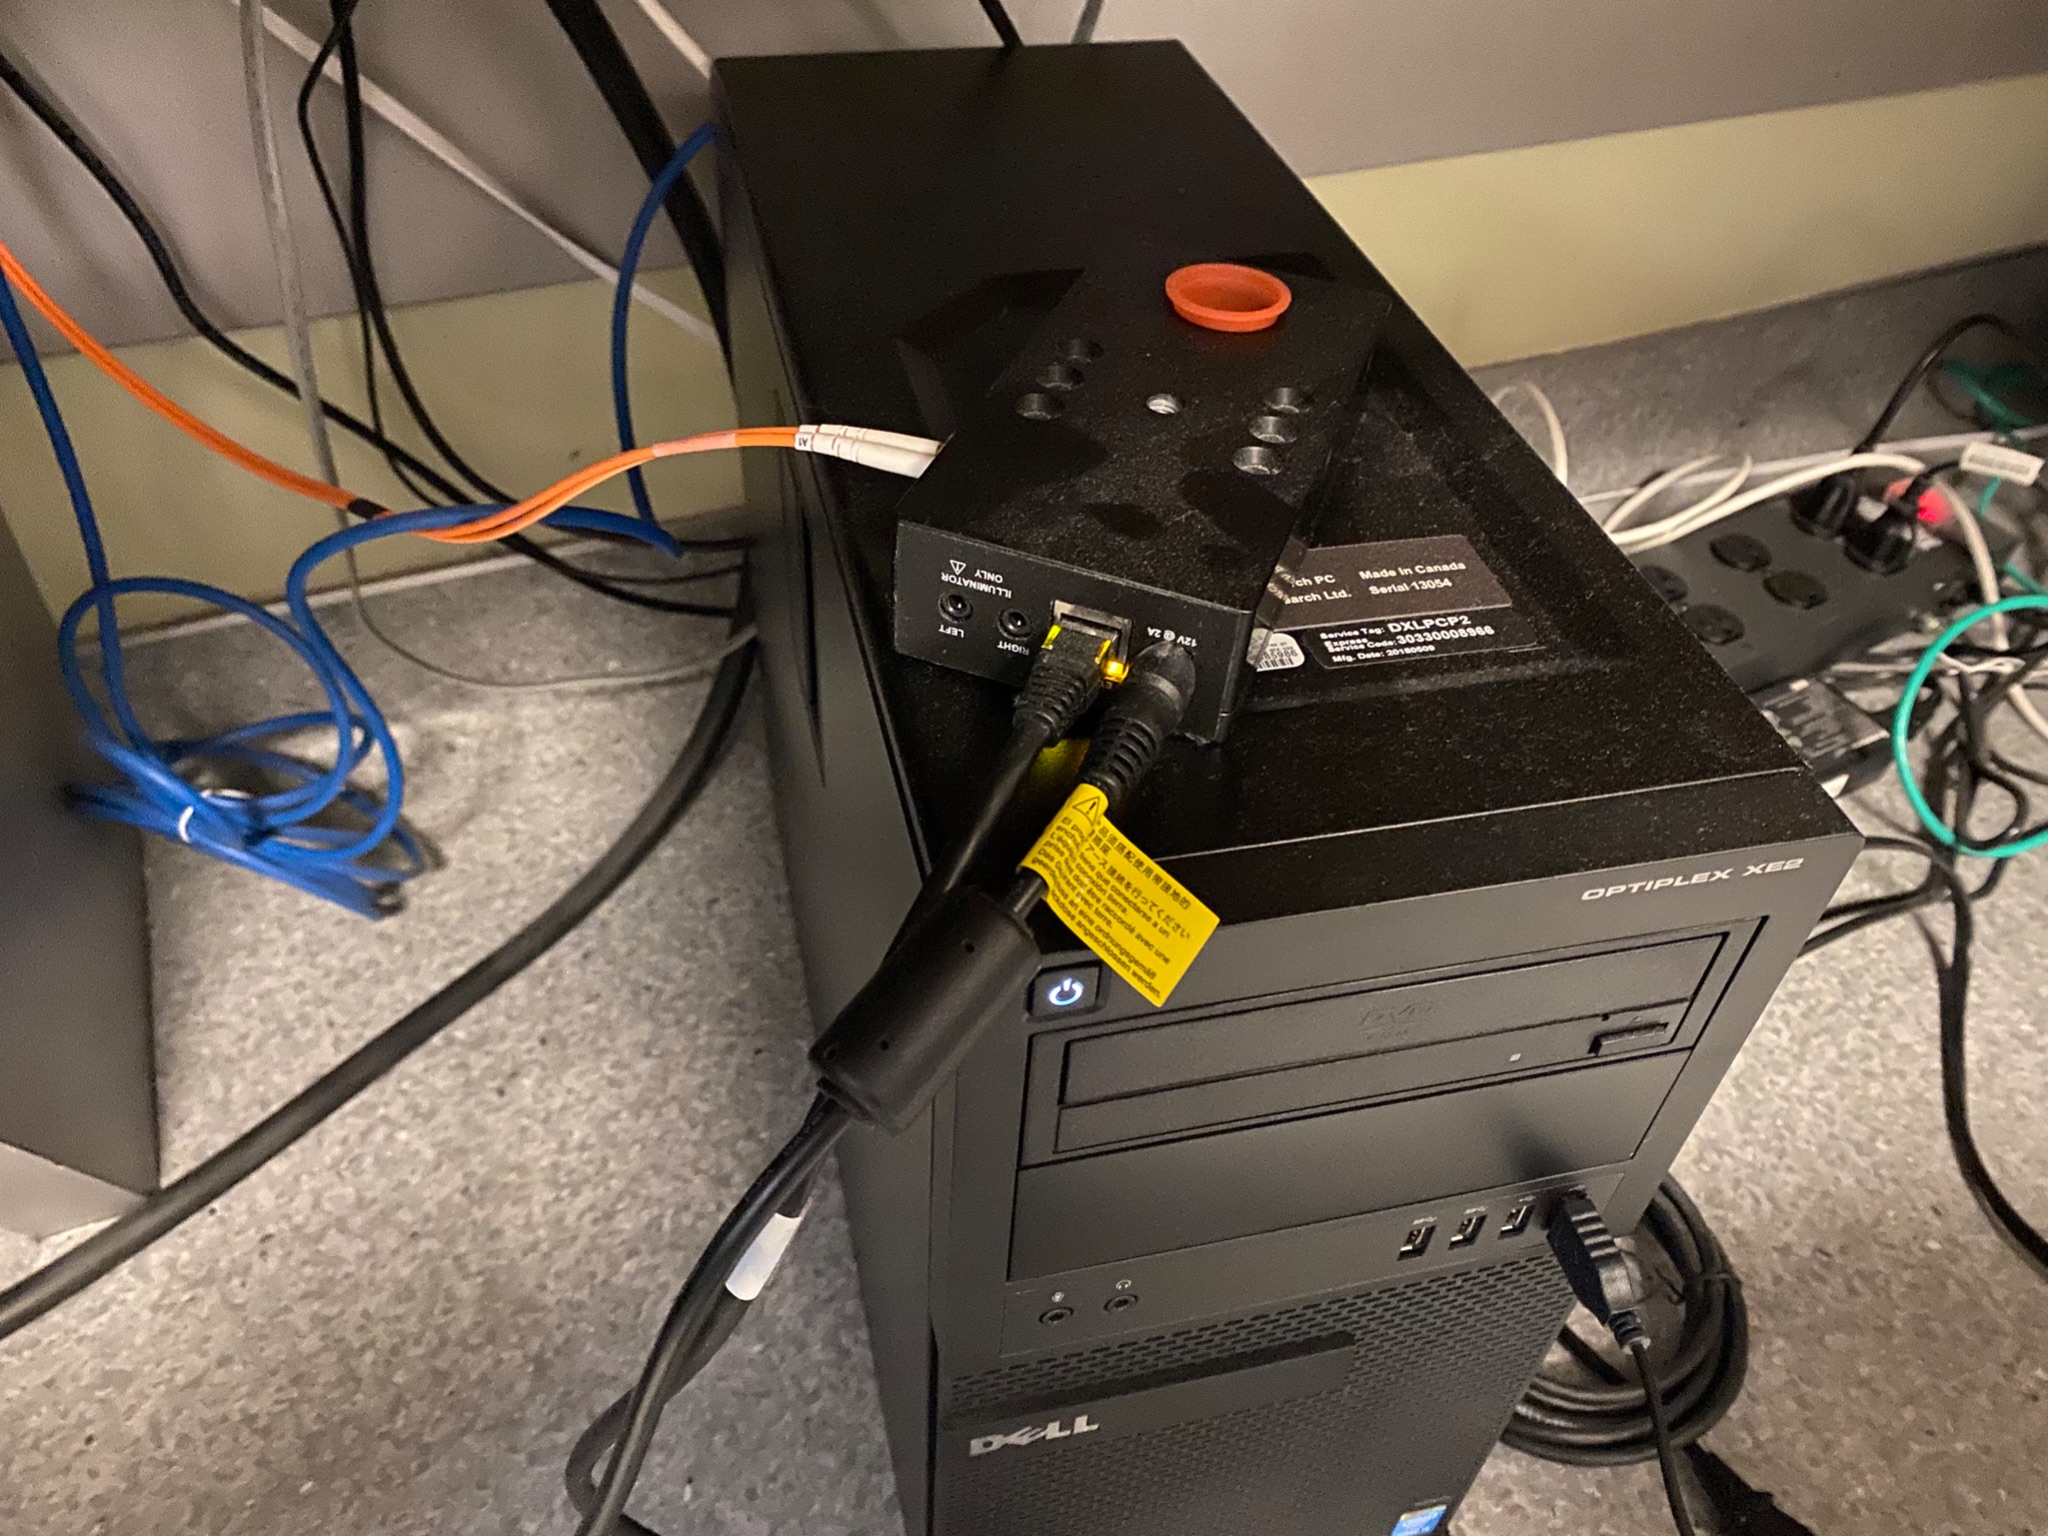
- At the Eyelink station on the right side of the room, there is a cable with a yellow tag on it and connected to a battery box labelled EYELINK (pictured below). This is the transducer cable--plug it into the rightmost port (labelled with "12V") on the box on top of the tower unit.
- Once the cables are connected to the eyetracker in the bore, turn on the tower unit. You will likely get errors if you try to power on before those cables are connected.


